Did you know you can set up your own integration between Klaviyo and HubSpot? It’s not as complicated as it sounds.
Let’s walk through the process together.
Types of information you can sync with Klaviyo and Hubspot
Table of Contents
Information You Can Sync with Klaviyo and HubSpot
Integrating HubSpot with Klaviyo offers a surprising number of ways to enhance your email and SMS marketing efforts. This powerful integration allows you to seamlessly create or update HubSpot contacts from new Klaviyo events and update HubSpot deals based on new Klaviyo events.
These are just a few possibilities that open up once the integration is complete.
Let’s explore the various ways Klaviyo and HubSpot can work together to supercharge your marketing strategy.
Contacts Sync
Sync contacts bidirectionally between Klaviyo and HubSpot. Changes in one platform are automatically updated in the other, keeping your contact information consistent across both systems.
Lists/Segments Sync
Map lists or segments in Klaviyo to corresponding lists or segments in HubSpot. This helps target specific contact groups based on behavior or attributes, enhancing your marketing campaigns.
Email Activity Sync
Synchronize email engagement data like opens, clicks, and conversions. This ensures both platforms have the latest information on how contacts interact with your emails, helping you optimize your strategies.
Custom Properties Sync
Map custom properties or fields between Klaviyo and HubSpot. This keeps additional contact information synchronized, providing a comprehensive view of your contacts in both platforms.
Step-by-Step Guide: Migrate HubSpot Contacts To New Klaviyo Profiles
What You’ll Need:
- HubSpot Account: Your source for contact information.
- Klaviyo Account: Where your contacts will be imported.
- iPaaS Solution: This stands for Integration Platform as a Service, which helps connect different applications. We’ll use Make, but alternatives like Zapier, n8n also work.
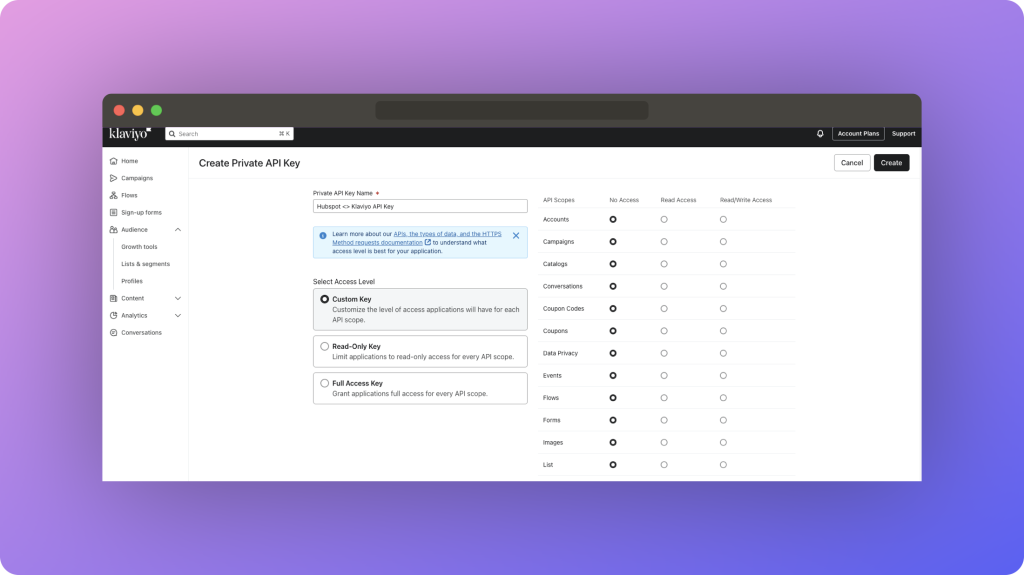
- Klaviyo API Key: This key allows us to make secure requests to Klaviyo’s system.
Generate Klaviyo API Key:

First, log in to your Klaviyo account. Navigate to the settings menu, which you can find in the bottom left corner.
Once you’re in the settings, select the API Keys option.
Here, you’ll create a new private API key. It’s helpful to give it a descriptive name, such as “Make API Key”. You’ll need to choose an access level; for this demo, select Full Access to ensure comprehensive integration capabilities.
Once you create the key, save it and copy it for later use.
Set Up Make Account:
Next, visit the Make website and sign up for a free account. The free plan offers up to 1,000 operations per month, which should be sufficient for initial integrations.
Once logged in, familiarize yourself with the dashboard. Most of your work will be within the “Scenarios” section.
Click on “Create New Scenario” to start setting up your integration.
Create a Scenario in Make:
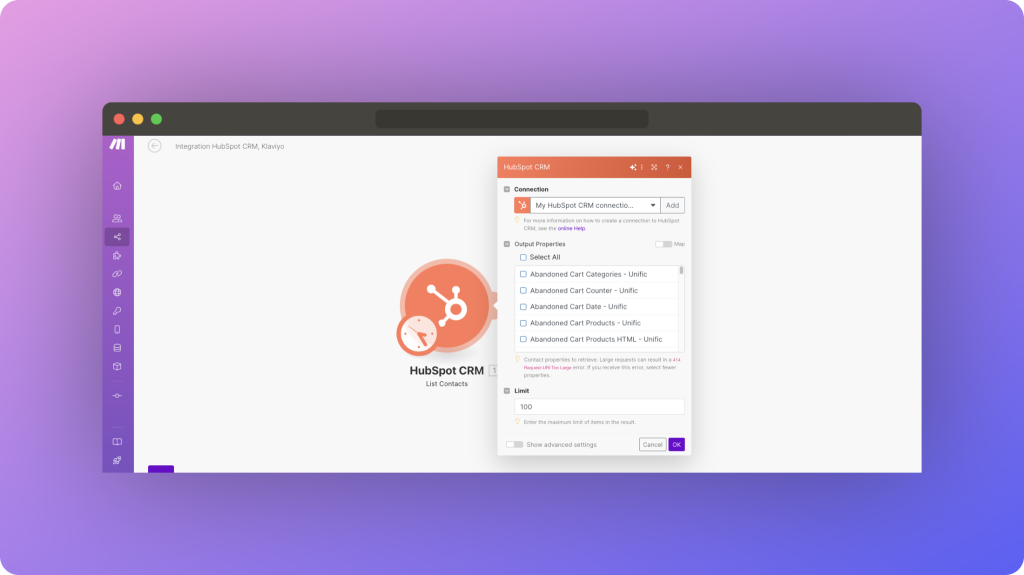
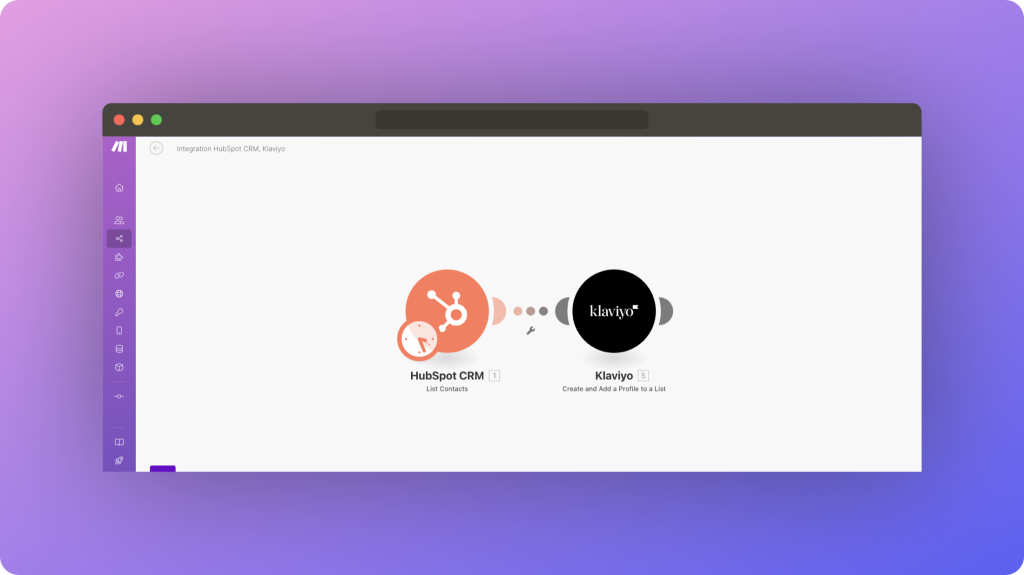
A scenario in Make is a series of automated actions triggered by specific events. Begin by adding a module to your scenario. Search for “HubSpot” and select it. You’ll be prompted to connect your HubSpot account to Make.
Follow the instructions, log in to HubSpot, and authorize the connection. Name your connection something memorable, like “My HubSpot Connection”.
Select HubSpot Properties:

Once connected, choose the action you want to perform with HubSpot, such as “Search for CRM Objects”.
From the list of available properties, select the ones you need, typically fields like First Name, Last Name, and Email. If necessary, customize the selection to match specific criteria for your integration.
Set Up Klaviyo Module in Make:
Add another module to your scenario and search for “Klaviyo”. Select it and create a connection using the API key you generated earlier.
Choose the action to “Add a Profile to a List”.
This allows you to add new contacts from HubSpot to a specific list in Klaviyo.
Map HubSpot Data to Klaviyo:
Now, map the selected HubSpot properties to the corresponding fields in Klaviyo. For example, map “First Name” in HubSpot to “First Name” in Klaviyo.
Ensure all necessary fields are mapped correctly to avoid data inconsistencies.
Save the scenario and run it to start the integration process.
Verify Integration:

After running the scenario, log in to Klaviyo and navigate to “Lists & Segments”. Open the list where your HubSpot contacts were imported, for instance, “New HubSpot Contacts”.
Check the profiles to ensure they appear correctly with all the mapped data, such as First Name, Last Name, and Email.
Conclusion
Integrating HubSpot with Klaviyo using Make is a straightforward process that can significantly enhance your marketing automation efforts.
By following these steps, you can seamlessly transfer contact information and ensure your data is always up-to-date.
If you have any questions or need assistance with more complex scenarios, feel free to reach out.


